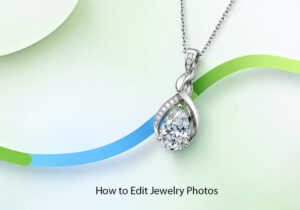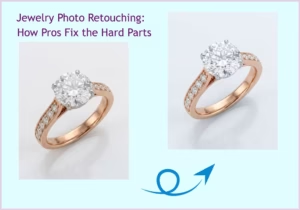

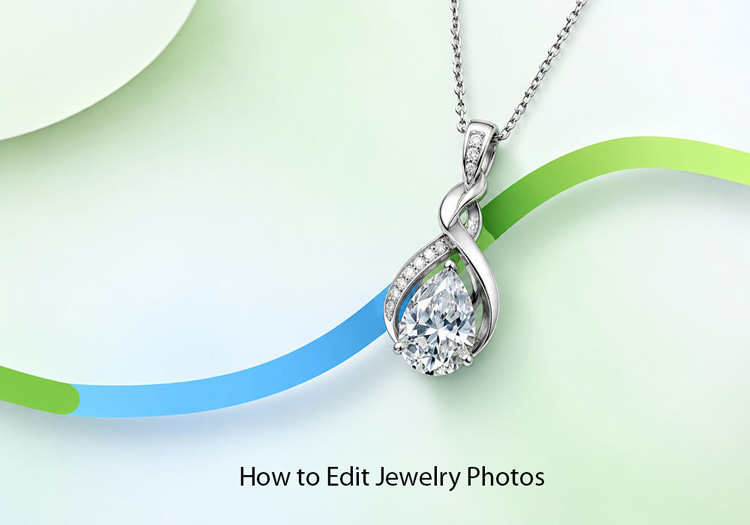
A good jewelry photograph has a difficult job. It has to show tiny details, accurate metal and gemstone colors, controlled reflections, convincing depth, and enough sharpness for a customer to understand what they are looking at. At the same time, it should not look so heavily edited that the jewelry appears different from the physical product.
That is why jewelry photo editing is less about making an image look dramatic and more about making it look accurate, clean, and intentional.
Why Professional Jewelry Photo Editing Matters
Jewelry is unusually demanding to photograph because its surfaces interact strongly with light. Polished gold, silver, platinum, diamonds, and gemstones can all produce reflections that change dramatically with small adjustments to the light setup or camera position.
A photograph can therefore be technically sharp but still fail to represent the product properly.
This matters when jewelry images are being used across online stores, catalogues, websites, advertising images, brochures, posters, or other display materials. A consistent collection of images makes it easier for customers to compare products without being distracted by differences in lighting, color, framing, or background.
What Makes a Jewelry Product Photo Ready to Sell?
A sales-ready final image should first be accurate. The metal should look like the actual metal, gemstone colors should remain believable, and important details such as engraving, facets, settings, and surface texture should remain visible.
It should also have sufficient image resolution for its intended use. A web image may need to remain clear when a customer zooms in, while a photograph intended for print may require considerably more information.
The important distinction is between enhancement and alteration. Retouching should remove distractions and improve communication without inventing qualities that the physical jewelry does not possess.
How to Adjust Exposure, Contrast, and White Balance
Before removing a single scratch, correct the basic image. Jewelry retouching becomes much easier when the original photograph contains as much useful tonal information as possible.
Start by checking exposure. An image that is too dark can hide gemstone detail and engraving, while an overexposed image can produce burnt-out highlights where information has been lost completely.
Fix Jewelry Photo Exposure While Preserving Fine Details
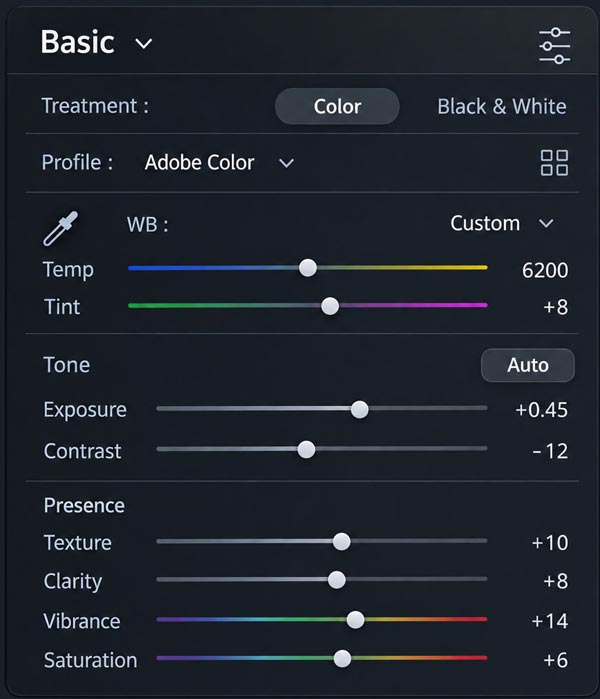
Use the exposure controls, levels, or midpoint adjustments to bring the overall brightness into a useful range. Pay particular attention to highlights on polished surfaces.
The objective is not simply to make the jewelry brighter. It is to preserve the maximum amount of information across the image.
If a diamond highlight is already completely white, increasing exposure will not reveal more detail. In that situation, the better solution may be to adjust the original lighting or recover information from a suitable RAW file.
Fix White Balance for Accurate Jewelry Colors
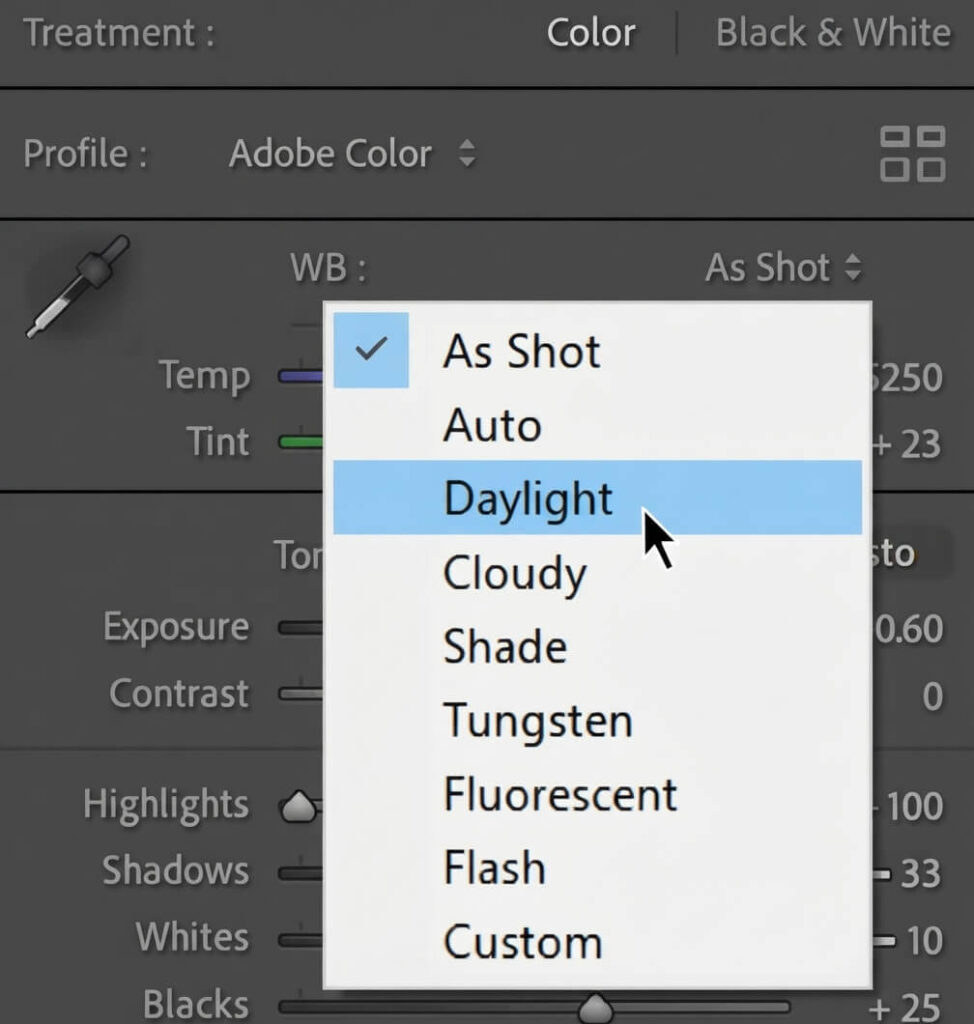
White balance has an enormous effect on jewelry photography. A warm color cast can make white gold or platinum appear yellow, while a cool cast can make yellow gold look dull or unnatural.
Use a neutral reference when possible and then check the result against the physical product. Pay particular attention to gemstones because their color is often central to the product’s identity.
Color correction should make the image more trustworthy, not simply more attractive.
Adjust Contrast Carefully
Contrast creates separation between light and dark areas, but too much contrast can remove subtle tonal gradations.
Jewelry often contains very small transitions between highlights and shadows. Those transitions help communicate curvature, depth, and polished surfaces. A moderate contrast adjustment can improve definition; an aggressive one can make the product look flat and harsh.
Correct Jewelry Colors With Hue, Saturation, and Vibrance
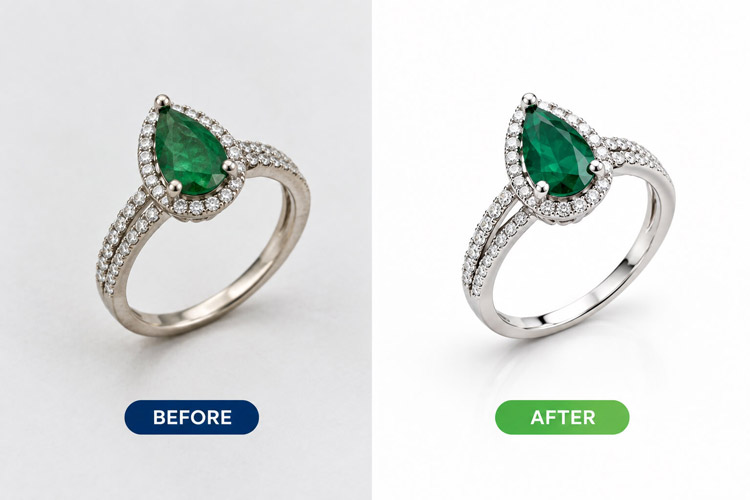
Once exposure and white balance are under control, move to color. Hue determines the basic color direction, while saturation controls its intensity.
The temptation is to increase saturation because stronger colors can look more impressive on a screen. With jewelry, however, that can quickly become misleading.
How to Adjust Hue and Saturation
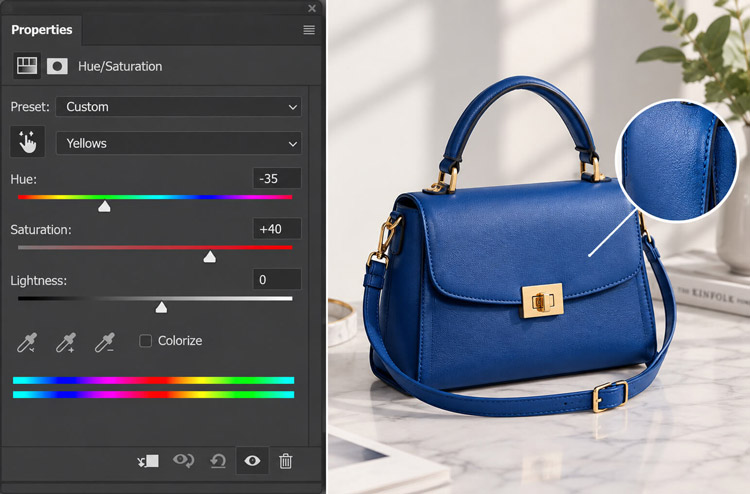
Use selective adjustments when only part of the image needs correction. For example, a colored gemstone may need a slight hue correction while the surrounding metal should remain untouched.
Work at a magnified view when necessary, but regularly zoom out to judge the photograph as a whole. A color that looks subtle at 200% magnification may become excessive at normal viewing size.
How to Make Gold, Silver, and Other Metals Look Accurate
Metal color should be judged alongside the gemstone and surrounding environment. Gold should retain its characteristic warmth without becoming orange, while silver and platinum should remain neutral without appearing artificially blue.
Also check small identifying details such as hallmarks, engravings, and inscriptions after color adjustments. These details should remain clear and consistent with the original product.
Retouch Scratches, Dust, Smudges, and Surface Imperfections
Cleaning is one of the most useful parts of jewelry image retouching. Even carefully handled pieces can contain dust, fingerprints, tiny scratches, or other marks that become extremely visible in a high-resolution photograph.
Remove Dust and Small Particles
Small dust particles can be removed using tools such as the healing brush, clone stamp, or spot-removal tools.
Work carefully around small diamonds and intricate settings. Removing a particle should not accidentally erase part of a stone or change the shape of a setting.
Remove Scratches Without Flattening the Jewelry
Scratches on polished metal can often be cleaned through careful cloning and localized retouching.
The important part is preserving the direction of the surface. Polished metal has natural gradients and reflections. If these are replaced with a perfectly uniform area, the jewelry can begin to look like plastic.
Clean Fingerprints, Smudges, and Unwanted Marks
Fingerprints and smudges are particularly distracting because viewers recognize them immediately as contamination rather than part of the product.
Remove them while preserving legitimate details such as engraving, hallmarking, and intentional texture. Retouching should clean the product, not erase its identity.
Control Reflections and Glare on Jewelry
Reflection is one of the defining challenges of jewelry photography. A polished surface behaves almost like a mirror, reflecting the light source, camera, studio, and surrounding objects.
Reduce Harsh or Distracting Glares
When glare hides an important part of the jewelry, reduce it selectively rather than simply lowering all highlights.
For future shoots, controlled reflections can often be achieved with diffusers, diffusion screens, carefully positioned lights, and sometimes a polarizing filter. Good lighting at capture is generally easier than trying to reconstruct missing information during post-production.
Preserve Highlights That Make Jewelry Look Premium
Not every highlight is a problem. Specular highlights are often what communicate that a metal surface is polished.
Removing every reflection can make jewelry look dull. The objective is controlled reflection: retain highlights that describe the form while reducing those that distract from it.
Sharpen Jewelry Details Without Making Them Look Fake
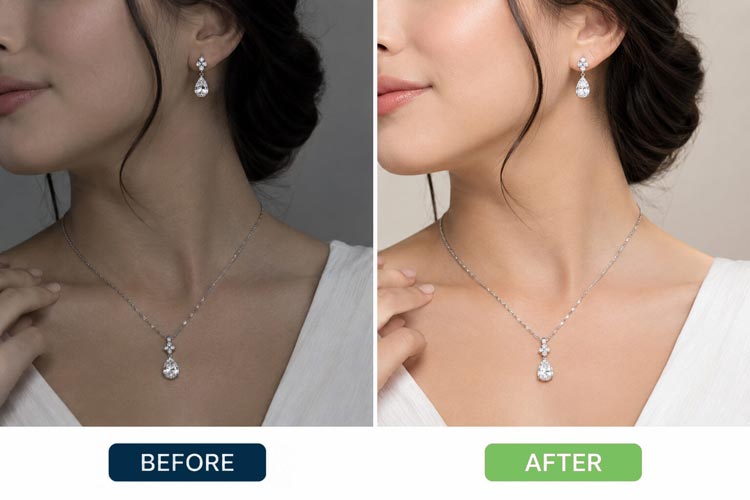
Jewelry photographs contain extremely fine details, so sharpening has an important role in the post-production workflow.
How to Sharpen Jewelry Product Photos
Use selective sharpening rather than applying an aggressive effect across the entire image. Edges around stones, settings, and important product details usually benefit more than smooth background areas.
It can also help to separate capture sharpening from final sharpening. The first compensates for the characteristics of the camera and lens; the final adjustment prepares the image for its intended output.
Recover Detail From Slightly Soft Images
Sharpening cannot fully repair an image that was seriously out of focus. If the focal plane missed the important part of the jewelry, software has limited information to work with.
For future shoots, focus stacking can solve this problem by combining several photographs taken at different focus distances. This is particularly useful for macro jewelry photography, where depth of field can be extremely shallow.
Enhance Jewelry Lighting During Post-Production
Post-production can refine lighting, but it should not replace a sensible lighting setup.
Add Subtle Lighting Effects to Make Jewelry Shine
Localized brightness adjustments can emphasize a gemstone or clarify the shape of a metal surface. Dodge and burn techniques are useful here because they allow very controlled changes rather than applying a global lighting effect.
The adjustment should follow the existing direction of the light. If the original image suggests light coming from one side, adding highlights from the opposite direction can immediately make the retouching look artificial.
Create a Natural Lens-Flare or Sparkle Effect
A small sparkle effect can sometimes emphasize diamonds or other highly reflective stones, but restraint matters.
The sparkle should support existing highlights rather than create the impression that every stone is producing a starburst. If the effect becomes the first thing a viewer notices, it is probably too strong.
Add or Refine Shadows for a 3D Product Look
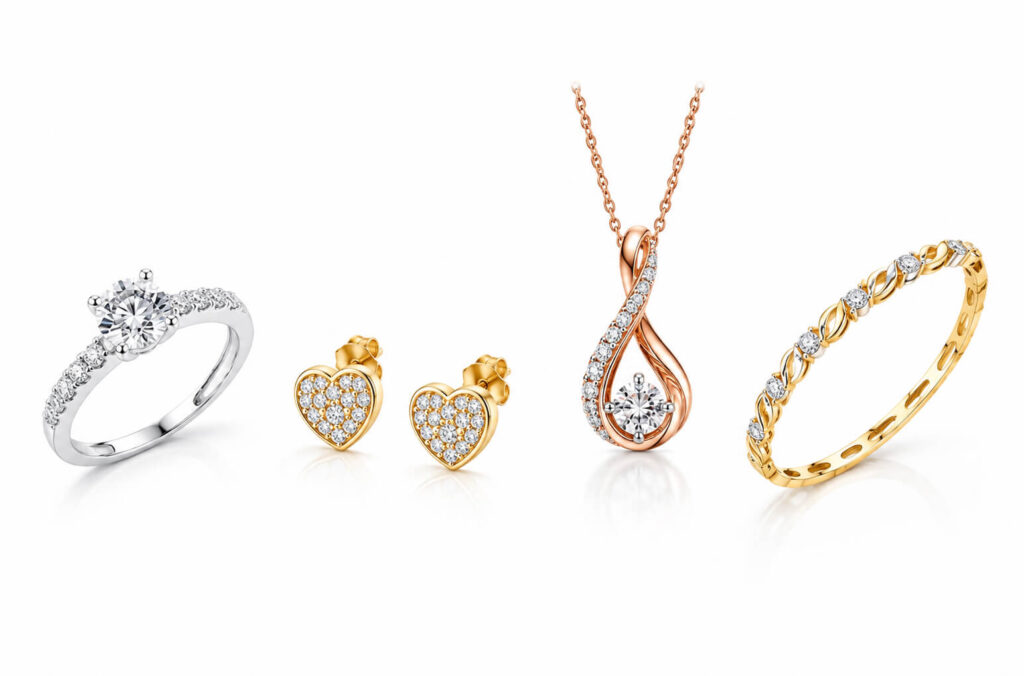
A completely shadowless product photograph can sometimes appear disconnected from its surface. A subtle shadow gives the object depth and helps communicate its position.
Create a Natural Reflective Shadow
A reflective shadow works particularly well on smooth surfaces. It can be created from the product itself and then reduced in opacity, softened, and adjusted to match the direction of the existing lighting.
The shadow should appear connected to the jewelry rather than floating beneath it.
Avoid Artificial-Looking Shadows
A common mistake is making the shadow too dark, too sharp, or too symmetrical.
Real shadows respond to the size and position of the light source. Softer lighting generally creates softer shadow edges. Match the shadow to the lighting conditions already visible in the photograph.
Create a Clean and Consistent Background
Background consistency becomes especially important when photographing an entire jewelry collection.
Remove and Replace the Background
Background removal can isolate the product and make it easier to create consistent ecommerce images. A white background is common for online stores because it keeps attention on the product and makes different product images easier to compare.
Automatic background removal can help with simple shapes, but detailed jewelry often requires manual masking and careful edge refinement.
Create a Clipping Path for Jewelry
A clipping path provides a precise boundary around the product and is particularly useful when the same jewelry image will be placed into different layouts.
Fine chains, prongs, gemstones, and small openings can make jewelry masking considerably more difficult than ordinary product masking. Zoom in to check edges before considering the background finished.
Crop and Resize Jewelry Photos for Different Uses
A good photograph can be repurposed for a product page, catalogue, advertisement, social post, or printed material, but each use may require different dimensions.
Maintain Consistent Product Framing
Keep the product scale, orientation, and position consistent across a collection. If one ring fills most of the frame while another occupies only half of it, the catalogue can feel inconsistent even when the editing quality is good.
Create a repeatable crop size and use it across similar products.
Prepare Different Versions for Different Platforms
Do not assume that one large file should be used everywhere. Web images may need to be optimized for loading speed, while print requires substantially more resolution.
Keep a high-quality master file and create appropriate output versions from it. This avoids repeatedly editing or resizing the same compressed photo.
How to Change Jewelry Colors for New Product Variants
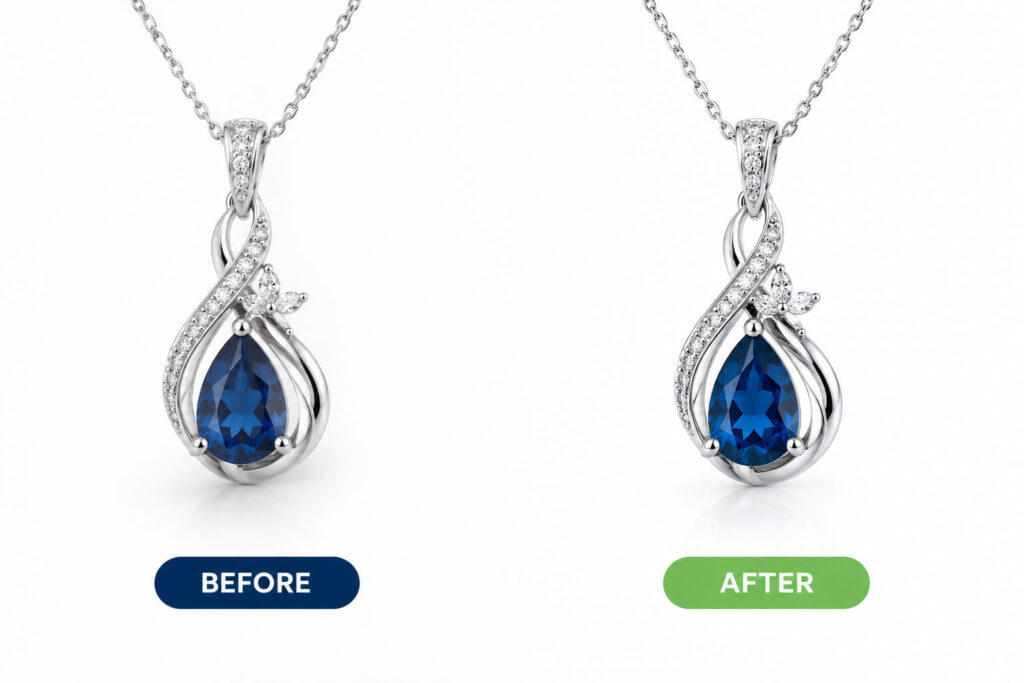
Color-changing techniques can be useful when a piece is available in several finishes, such as yellow gold, rose gold, white gold, or platinum.
How to Change the Color of Jewelry
Separate the metal from gemstones and other materials first. Then use selective color, hue, saturation, curves, or masking techniques to modify the relevant areas.
The goal is to change the material’s apparent color while preserving its existing highlights and shadows. Those tonal differences are what make the surface look metallic.
Common Color-Changing Mistakes
The biggest mistake is treating the entire jewelry image as one color.
Gemstones, diamonds, engravings, and reflections may respond differently to the adjustment. If everything is shifted together, the result can look obviously unrealistic.
Always compare the edited version with a genuine product reference when possible.
Use Advanced Retouching to Make Jewelry Look Premium
Advanced retouching becomes useful when ordinary corrections cannot produce the required level of detail.
Dodge and Burn for Dimension
Dodge and burn can strengthen subtle highlights and shadows while maintaining the original structure of the jewelry.
It is particularly useful for facet definition, curved metal, and areas where the product looks slightly flat after cleaning.
Frequency Separation for Detailed Retouching
Frequency separation separates fine texture from broader tonal information. It can be useful for detailed retouching when you need to clean uneven areas without destroying important texture.
It should not be treated as a universal solution. If used excessively, it can remove the natural character of the material.
Focus Stacking and Detail Enhancement
Macro photography creates a technical limitation: the closer the camera gets, the shallower the depth of field becomes.
Focus stacking addresses this by combining multiple captures focused at different distances. Depending on the product and camera setup, a stack may contain several photographs rather than relying on one exposure.
The software combines the sharp portions into a single image with greater front-to-back sharpness. The main challenge is checking for stacking artefacts around fine edges and reflective surfaces.
Keep Jewelry Photos Realistic While Making Them Look Better
The strongest jewelry retouching is usually invisible.
A diamond should still look like a diamond. Gold should still look like gold. A gemstone should retain its natural color and structure. Reflections should make sense, and shadows should remain physically believable.
This is especially important for ecommerce because customers eventually see the physical product. If the photograph promises something the jewelry cannot deliver, the editing has gone too far.
A useful test is simple: compare the image with the actual piece and ask whether the photograph is clearer or merely more flattering.
Build a Consistent Jewelry Photo Editing Workflow
A repeatable workflow reduces mistakes and makes large jewelry collections much easier to manage.
Step 1: Organize and Select the Best Image
Begin with the strongest original capture. When available, work from a RAW file because it preserves more information for exposure and color adjustments.
Step 2: Correct Exposure and White Balance
Set the basic brightness and neutralize unwanted color casts before beginning detailed retouching.
Step 3: Correct Colors
Adjust the jewelry and gemstone colors selectively. Check the result against the physical product whenever possible.
Step 4: Clean the Jewelry
Remove dust, scratches, fingerprints, and temporary blemishes while protecting legitimate product details.
Step 5: Control Reflections
Reduce distracting reflections while preserving highlights that communicate polished surfaces and gemstone brilliance.
Step 6: Enhance Details
Apply selective sharpening and improve important areas of gemstone and product detail without introducing halos or excessive texture.
Step 7: Improve Lighting and Shadows
Use subtle dodge and burn, lighting adjustments, and reflective shadows to strengthen depth.
Step 8: Refine the Background
Remove distractions, create a clean background, and maintain consistency across the product collection.
Step 9: Crop and Resize
Apply consistent framing and create the required web, catalogue, or print versions.
Step 10: Perform a Final Quality Check
Inspect the image at normal viewing size and at high magnification. Look for inaccurate color, missing details, retouching marks, stacking artefacts, inconsistent framing, and excessive sharpening.
Common Jewelry Photo Editing Mistakes to Avoid
The most common mistake is simply doing too much.
Excessive saturation can make gemstones look unnatural. Over-sharpening can create harsh edges. Removing every reflection can make metal look flat. Heavy smoothing can destroy surface detail, while artificial shadows can make the jewelry appear disconnected from its environment.
Another problem is trying to fix an image in post-production when the underlying photograph was poor. If the exposure is badly clipped, the focus is seriously missed, or an important reflection has completely hidden a surface, editing software may not have enough information to recover it.
Good jewelry photography and good post-production therefore work together.
Jewelry Photo Editing Tips for Different Types of Jewelry
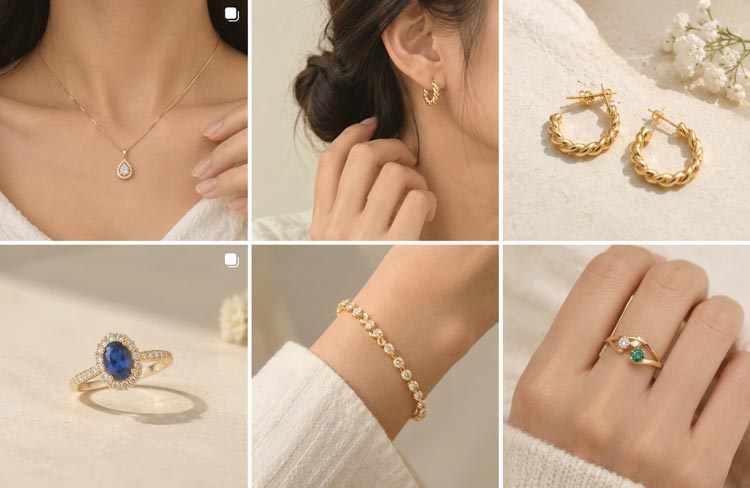
Different materials require different priorities during editing.
Diamond Jewelry
Diamonds depend heavily on controlled light and facet definition. Preserve small highlights and avoid excessive sharpening around individual stones. In halo settings, make sure small diamonds remain visually distinct rather than becoming one bright mass.
Gold Jewelry
Gold requires careful color correction. Yellow gold should retain warmth, while rose gold needs a controlled pink tone. Polished areas should retain natural gradients rather than becoming uniformly colored.
Silver and Platinum Jewelry
Silver and platinum are highly reflective and can easily pick up unwanted environmental color. Pay particular attention to reflections and neutral color balance.
Gemstone Jewelry
Gemstone photography requires careful color management. Emeralds, sapphires, tanzanite, tsavorite, and pink tourmaline can all vary significantly in tone. Avoid changing saturation simply to make the stone appear more vivid.
Highly Reflective Jewelry
Highly reflective jewelry benefits from controlled reflections during capture. Diffusion materials and carefully positioned lighting can often solve problems that would otherwise require extensive reflection removal during retouching.
How to Edit Jewelry Photos for E-Commerce
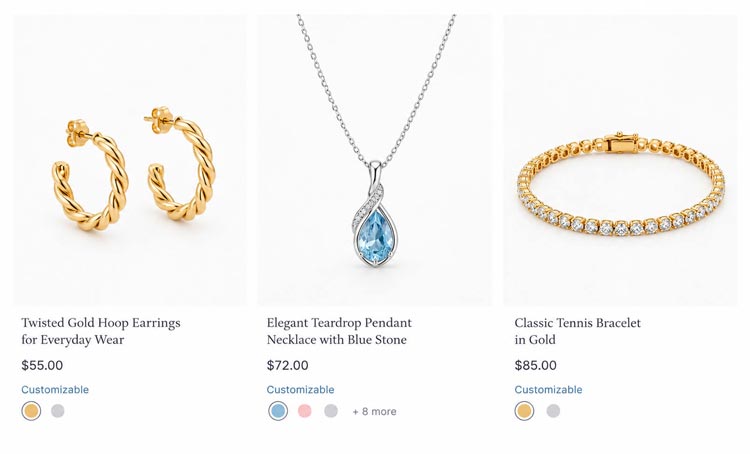
Ecommerce photography needs consistency more than visual experimentation.
Customers often view several products on the same page, so differences in background, scale, crop, brightness, or color can make the collection look less professional.
Create a Jewelry Image Quality Checklist
Before publishing, check five basic areas: accuracy, detail, consistency, framing, and output quality.
The metal should look accurate. Gemstones should retain believable color. Important details should remain visible. Products should occupy a consistent amount of the frame, and every file should meet the required dimensions and format.
This is especially useful when working with large product collections because a checklist turns subjective editing into a repeatable production process.
Quality Check: Does the Image Actually Help Sell the Jewelry?
The final question is not whether the photograph looks impressive in Photoshop.
Ask whether it helps someone understand the actual product.
Can the viewer see the gemstone detail? Does the metal look accurate? Are the reflections believable? Is the image sharp where it needs to be? Does the product sit naturally against its background? Does it look consistent with the rest of the collection?
If the answer is yes, the image is doing its job.
FAQs
1. How do you edit jewelry photos professionally?
Professional jewelry photo editing involves correcting exposure, white balance, colors, contrast, and sharpness while removing imperfections. Retouchers also enhance gemstone sparkle, clean backgrounds, and preserve realistic metal textures for polished, sales-ready images.
2. What is the best software for jewelry photo editing?
Adobe Photoshop is widely used for professional jewelry photo editing because it provides precise control over color, retouching, reflections, shadows, and intricate details. Lightroom can complement Photoshop for batch adjustments and basic corrections.
3. How do you make jewelry sparkle in Photoshop?
To enhance gemstone sparkle in Photoshop, carefully increase highlights, contrast, and clarity while selectively brightening facets. Dodge and burn techniques can emphasize reflections and brilliance without making gemstones appear unrealistic or overly processed.
4. How do you remove imperfections from jewelry photos?
Use Photoshop’s healing, clone stamp, and frequency separation techniques to remove dust, scratches, fingerprints, and unwanted marks. Work carefully around gemstones and metal edges to maintain natural textures and preserve important product details.
5. How do you make jewelry look more realistic in photos?
Maintain accurate metal colors, natural reflections, realistic shadows, and visible gemstone details. Avoid excessive sharpening, saturation, or brightness. Professional retouching should enhance the jewelry’s appearance while keeping its shape, texture, and proportions authentic.
6. What background is best for jewelry product photos?
White or neutral backgrounds are commonly used for jewelry product photography because they create a clean, consistent appearance and keep attention on the product. Transparent or lifestyle backgrounds can also work depending on branding and marketplace requirements.
Final Thoughts
Jewelry photo editing is ultimately an exercise in controlled improvement. The photograph starts with the physical product, and every adjustment should help the viewer understand that product more clearly.