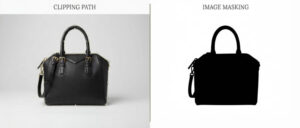

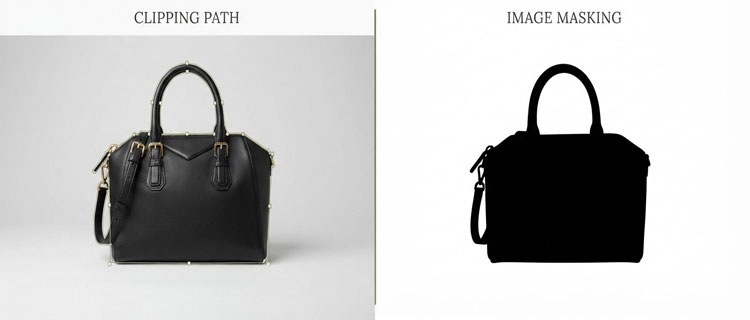
Image Masking vs Clipping Path is an important topic in the photo editing industry, especially for achieving high-quality and professional image results.
More details are provided below, which will give you a clearer understanding of when to use image masking and when a clipping path is the better choice.
What Background Removal Really Means
Background removal is an umbrella term. Under it, you’ll find multiple professional techniques that create clean subject isolation so your product can sit on white, transparent, or lifestyle backgrounds.
The tricky part is that not all edges are equal. A ceramic mug has hard edges. A model’s hair has hundreds of semi-transparent strands. A perfume bottle might be hard-edged, but the glass and reflections complicate everything. This is exactly why this decision matters.
What Is A Clipping Path?
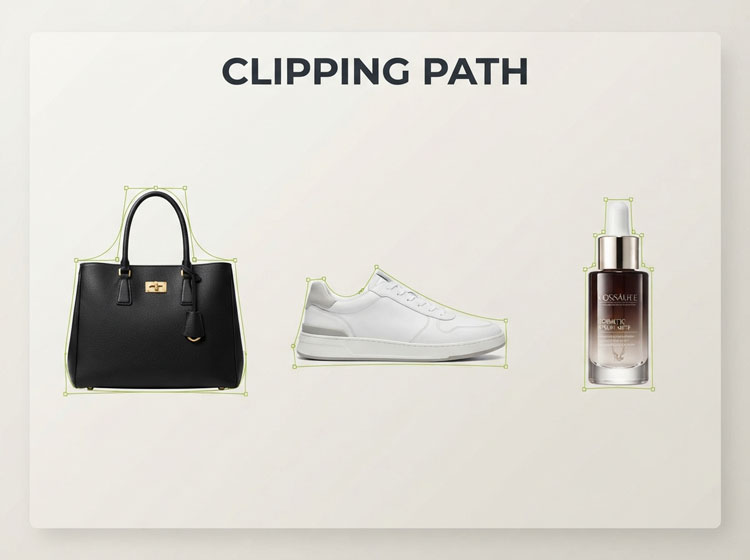
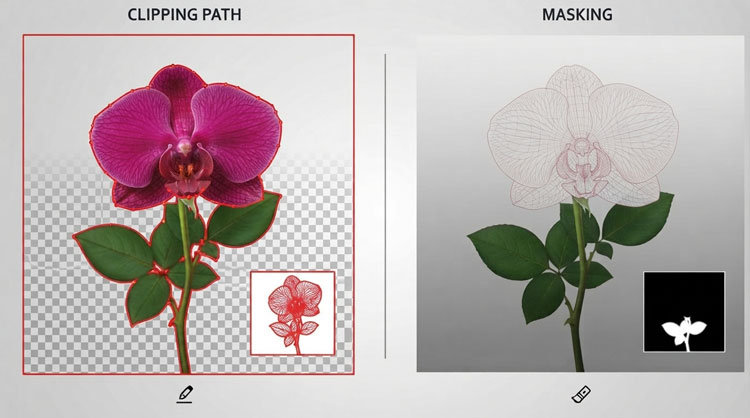
It is a vector-based outline created around an object using the Pen Tool (typically in Adobe Photoshop). Think of it as drawing a precise boundary that cleanly separates the subject from the background.
These are best for objects with clear, well-defined edges. Once the path is closed, the background can be removed or hidden, and the subject remains crisp.
What Is Image Masking?
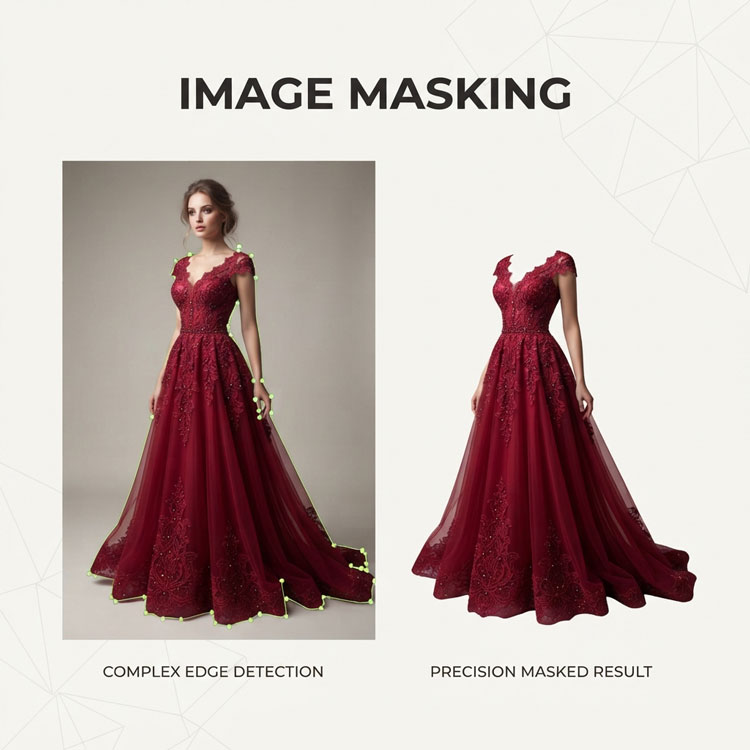
Image masking is a technique that uses masks to hide or reveal parts of an image with more nuance than a hard cut. Instead of simply cutting the background away, masking lets you preserve soft edges and partial transparency. That includes hair, fur, sheer fabric, smoke, feathers, and even complex lighting falloff around objects.
Hair masking in Photoshop often uses layer masking, channel masks, luminosity masks, or advanced manual brushwork. In this debate, masking is usually the better choice when the edges are complicated or semi-transparent.
The Core Differences
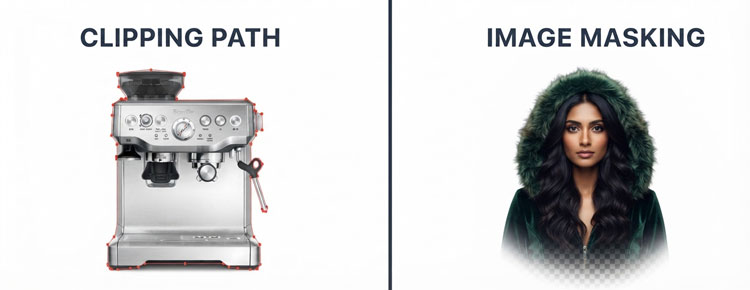
The easiest way to understand is to think about how each method treats edges and transparency.
Clipping path creates a hard boundary. It’s clean, predictable, and great when your subject has solid edges. Image masking handles softness. It can keep tiny details.
Here are the main differences you should keep in mind:
- Edge Type: Clipping is best for hard edges; masking is best for soft or mixed edges.
- Transparency: Clipping struggles with transparent areas; masking is designed for them.
- Complexity: Clipping is usually faster; masking takes more time and skill for realistic results.
- Output Needs: Both can deliver PNG transparency, but masking typically looks more natural for hair, fur, and glass.
You’ll notice we only used one bullet section here for clarity. The rest of this article will stay in smooth, easy paragraphs.
When Clipping Path Is The Better Choice
If you work with e-commerce images daily, you’ll love clipping paths for the right product types.
It is ideal for products like electronics, boxes, shoes with clear outlines, kitchen tools, bottles with solid labels, furniture silhouettes, and most hard goods.
It’s also great when you need consistent results across a full catalog. For example, if you’re uploading 500 SKUs and each item needs a clean white background, clipping paths keep everything uniform and easy to standardize.
When Image Masking Is The Better Choice
Now flip the scenario. If your subject has fine details, soft edges, or partial transparency, fur layer masking photo editing is usually the safer bet.
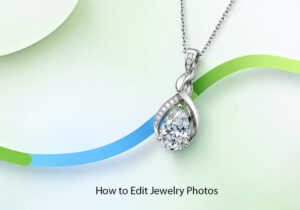
Hair is the classic example. A clipping path can outline a hairstyle, but it cannot realistically capture flyaway strands without looking like a helmet. Fur is the same. Jewelry can also be surprisingly tricky because small gaps, reflections, and shine can get damaged by a hard cut.
Image masking also becomes important when your product includes transparent or semi-transparent areas. Glass, acrylic, thin plastic, veils, netted fabric, and liquid splashes all benefit from masking because the edge isn’t a simple on/off boundary. It’s gradual, and sometimes it changes across the subject.
The Both Option: Combining Image Masking And Clipping Path
Here’s what many people don’t realize until they’ve done professional post-production work: the best solution is often not choosing one method. It’s combining them.
A common approach is to use path for the main body of the product (hard edges) and masking for the tricky sections (hair, fur, lace, glass edges, or shadows). This hybrid method keeps the subject clean and controlled while preserving realism where it matters most.
For e-commerce, this is especially useful when you need clean edges but also want natural-looking shadows or preserved transparency.
How Shadows And Reflections Affect The Choice
A clean cutout is one thing. A realistic product presentation is another.
If your background replacement is too aggressive, you can accidentally remove natural shadows and grounding, making the product look like it’s floating. Clipping can remove everything outside the outline, which is great for pure white backgrounds, but it may also remove shadow detail unless it’s rebuilt later.
Masking can preserve soft shadows better because it can keep subtle gradients. If shadows and reflections are part of your brand style, masking or a combined approach usually produces a more premium look.
For reflective surfaces, like glossy packaging or metallic products, masking can also help retain natural transitions that make the product look real rather than pasted.
How to Spot Poor-Quality Background Removal
If you’re outsourcing or reviewing edits internally, it helps to know what wrong method looks like. Many issues show up at 200% zoom, but you can often spot them even at normal size once you know what to look for.
Masking mistakes often show up as fringing (a leftover halo from the old background), overly blurred edges, or hair that looks smudged.
A clean result should look natural on multiple backgrounds. One quick test is to drop your cutout onto a dark background and then a light background. Halos, edge color contamination, and roughness become obvious immediately.
Clipping Path vs Image Masking: Which Offers Better Value?
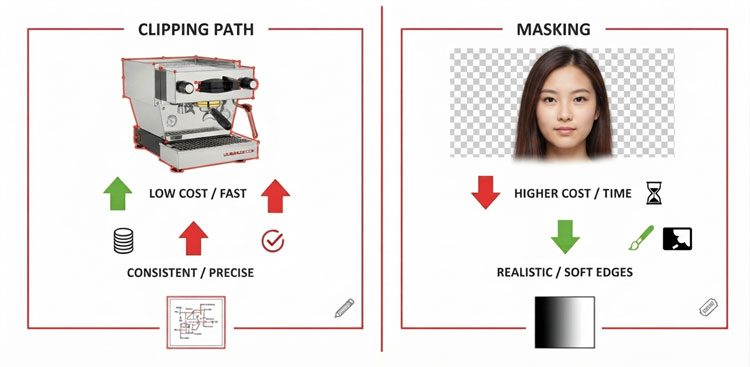
Clippings are typically faster, which often makes them cheaper per image. For straightforward products, that’s great. But choosing it when masking is needed can lead to rework, inconsistent listings, and lower conversion because the images look edited.
Masking can cost a bit more because it’s more manual and detail-oriented. But in the trade-off, masking often wins for high-value products, hero images, and fashion or beauty photos where edge realism matters.
If you’re optimizing a large catalog, you can also segment your images. Use clipping for simple items and reserve masking for complex subjects. That way you don’t overspend where you don’t need to, and you don’t compromise where you can’t.
E-Commerce Use Cases: Quick Recommendations That Actually Work
For hard goods like appliances, tools, most packaging, and simple shapes, clipping is usually the most efficient solution. For fashion models, hair, furry products, plush items, plants, and anything with thin details or transparency, image masking is typically the better choice. For glass bottles, cosmetics, and shiny objects, combining both is often the cleanest solution.
This is also where consistent post-production matters. Even if one product can be clipped, your brand may still prefer masking if your catalog relies on soft shadows or natural edges for a premium look. The best method is always the one that matches your brand style and quality bar.
How To Choose The Right Technique For Your Next Batch
If you’re not sure which technique to choose, start by looking at the edges of your subject. Are there any soft, fine, or transparent areas that need to look natural?
If the edges are clean and well-defined, a clipping path is usually the right choice. For hair, fur, transparency, or other fine details, image masking can preserve a more natural appearance. When an image contains both hard and soft edges, combining both techniques may deliver the best result.
The good news is that choosing the right method doesn’t have to be complicated. Review the types of products in your catalog and test a few representative images. This will help you determine which technique provides the best balance of quality, consistency, and efficiency.
Frequently Asked Questions
Is Image Masking Better Than Clipping Path?
In image masking or clipping, masking is better for hair, fur, and transparency, while clipping is better for hard edges. “Better” depends on your product edges and realism needs.
Can I Use Clipping For Hair or Fur?
It can outline hair roughly, but it usually looks unnatural. Image masking preserves fine strands and soft edges, so it’s the preferred method.
Which Technique Works Best For Transparent Products Like Glass?
In image masking or clipping, transparent objects usually need image masking or a combined approach. Masking helps keep realistic edges, reflections, and partial transparency without harsh cut lines.
Which Is Faster For Bulk E-Commerce Catalogs?
Clipping is typically faster and more cost-efficient for large batches of simple products. In image masking or clipping, masking takes longer but pays off for complex edges and premium images.
Can Image Masking and Clipping Paths Be Used Together?
Yes. In image masking or clipping path, combining both is common. We often use clipping path for hard edges and image masking for soft or transparent areas to keep results clean and realistic.
Final Thoughts
Getting the details right can make a big difference in how professional your product images look. If you’re unsure which technique is best, send over a few sample images. This makes it easier to recommend the right approach and ensure your photos look clean, natural, and ready for your customers.