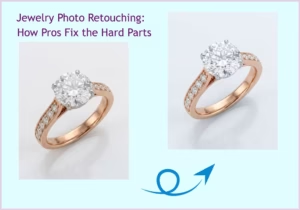

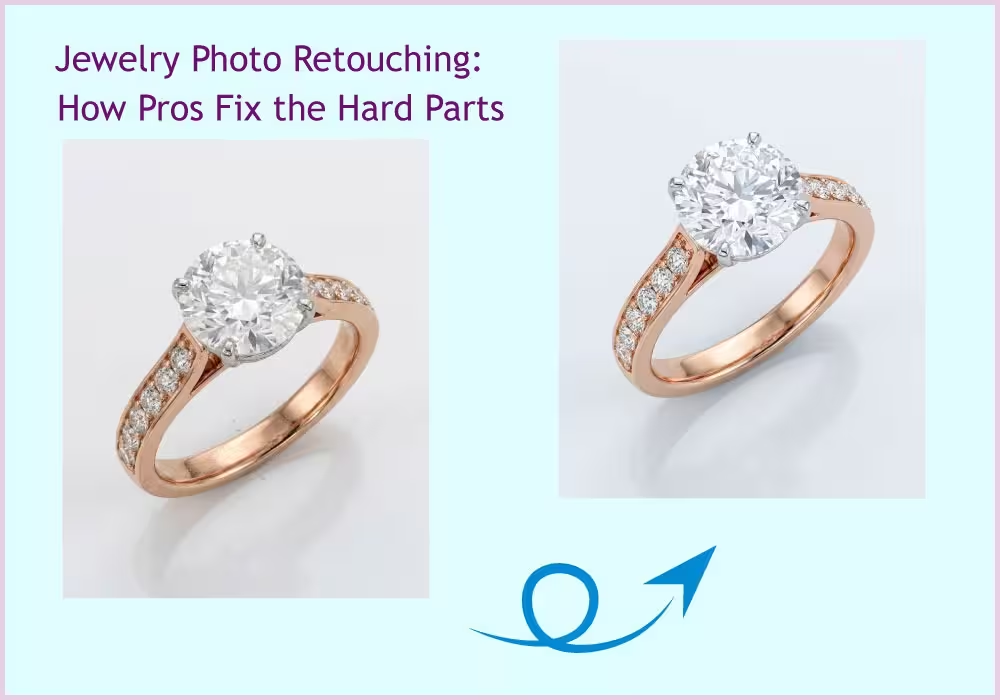
Jewelry is one of the hardest things to retouch. You can shoot a ring on a clean white background, get the lighting right, and still end up with an image full of reflections, dust, weird color casts, and a stone that looks flat instead of brilliant.
Most generic retouching workflows do not work here. AI tools eat through chain links. Over-smoothing makes gold look like plastic. The same edits that work on a sneaker or a watch will absolutely ruin a diamond ring.
In this guide, we are walking through why jewelry is so tough to edit, the main challenges pros face, and the actual techniques they use to fix each one. If you are running a jewelry store, shooting for one, or thinking about outsourcing, this should give you a clear picture of what good retouching looks like.
Let’s get into it.
What Is Jewelry Photo Retouching?
Jewelry photo retouching is the post-production work that takes a raw jewelry shot and makes it ready for an online store, a catalog, or a printed campaign. It is more than just brightening the photo or removing the background.
A proper jewelry retouch usually involves:
- Focus stacking, to combine sharp areas from multiple shots into one fully sharp image
- Reflection removal, to clean up studio glare on metals without killing the shine
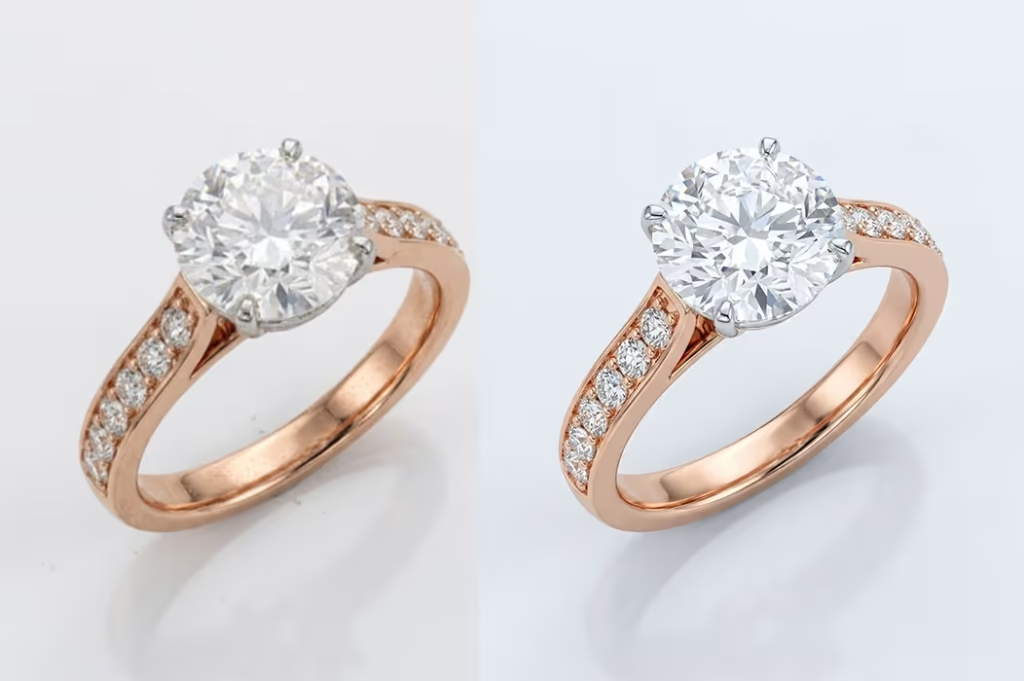
- Gemstone enhancement, to bring back the sparkle and dimension a flat photo loses
- Clipping paths, to cut out the piece cleanly, including the negative spaces inside chains and prong settings
- Color correction, to keep metals and stones looking accurate across the whole catalog
- Dust and scratch cleanup, even on brand new pieces, since macro lenses pick up every speck
Good retouching makes the work invisible. The viewer just sees a beautiful product. The bad version is obvious right away: the metal looks fake, the stones look dull, or the edges of the cutout are jagged.
Why Jewelry Is the Hardest Product to Retouch
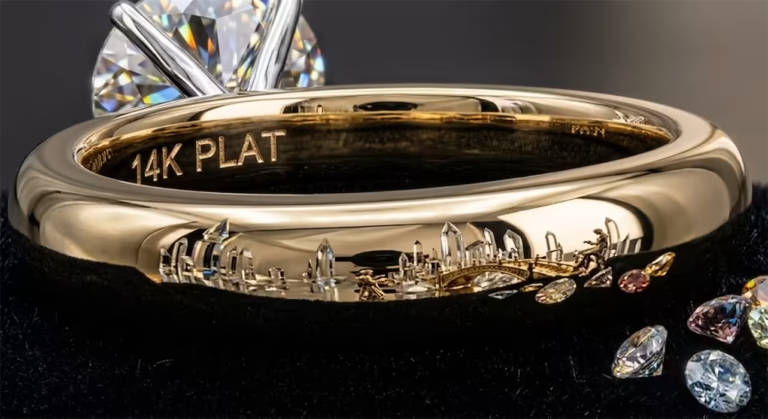
Most product categories have one or two main retouching headaches. Apparel has wrinkles. Furniture has texture issues. Electronics have screen glare. Jewelry has all of them at once, packed into a tiny piece.
Here is what makes a single ring or necklace so tough:
- Polished metals act like little mirrors. They pick up the camera, the photographer, the softboxes, even the ceiling.
- Gemstones bend and scatter light in unpredictable ways, so a brilliant diamond can look flat and grey straight out of camera.
- Macro shooting at close distances creates extremely shallow depth of field. The front of a ring is sharp, the back is a blur.
- Engravings, prongs, and tiny chain links need precise selection work. AI tools usually fail here.
- Brand new pieces still show dust and micro-scratches under a macro lens. The photo lighting picks up things the human eye misses.
Because of this, one image often needs four or five different retouching techniques layered on top of each other. A standard product retouch flow is not enough.
Challenge 1: The Shallow Depth of Field Problem
The closer the camera, the smaller the area in focus. With a ring or a small pendant, you might only get a few millimeters of sharpness in a single shot. The center stone is crisp, the band fades into a blur.
That looks fine for a fine art photo. For an ecommerce product page, it is a problem. Customers want to see the full piece in detail.
The Fix: Focus Stacking
Focus stacking is when you shoot the same piece multiple times, each time focused on a different spot, then blend them into one fully sharp image. A simple flat pendant might need 5 to 8 shots. A three-dimensional ring with a tall setting can need 15 to 20 shots, sometimes more.
Photoshop has an Auto-Blend Layers tool that does most of the heavy lifting. The retoucher loads all the shots as layers, lets Photoshop align them, then runs the blend with the Stack Images option turned on. It is not a one-click job. The blend usually needs cleanup after.
Pro tip: if you know your editor will be focus stacking, plan for it on the shoot. Lock the camera on a tripod, do not move the piece between shots, and use manual focus to step through the depth one click at a time. A clean stack saves hours in post.
Challenge 2: Reflections on Metal Surfaces
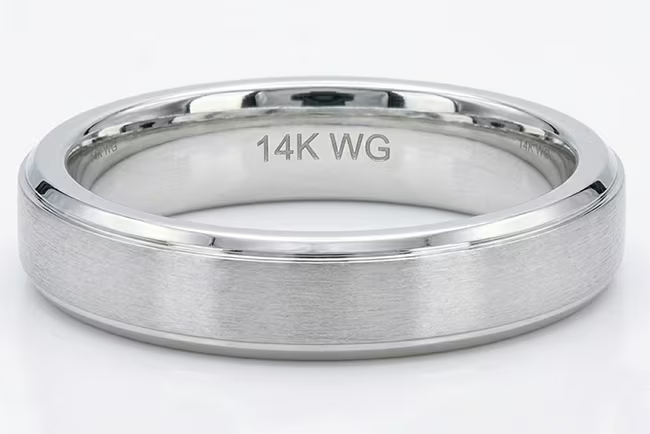
Gold, silver, and platinum will reflect anything you put around them. Set up two softboxes and you will see two softboxes in the ring. Move the camera and the camera shows up. There is no fully reflection-free way to shoot a polished metal piece, so most of the cleanup has to happen in post.
The trick is figuring out which reflections to keep and which to remove. Some reflections are good. They are what makes gold look like gold and silver look like silver. Remove all of them and you end up with a flat shape that looks more like a sticker.
The Fix: Selective Reflection Removal
Pros usually approach this in two passes:
- Use the Pen Tool to isolate the reflective areas you want to work on
- Use Blend If or layer masks to clean up the distracting reflections (camera, photographer, weird shadows) while leaving the natural shine intact
The goal is not a perfectly smooth surface. The goal is a metal that still looks like metal but without distractions. Over-smoothing is one of the most common beginner mistakes. The piece ends up looking cheap and CGI-like.
Challenge 3: Bringing Gemstone Sparkle Back
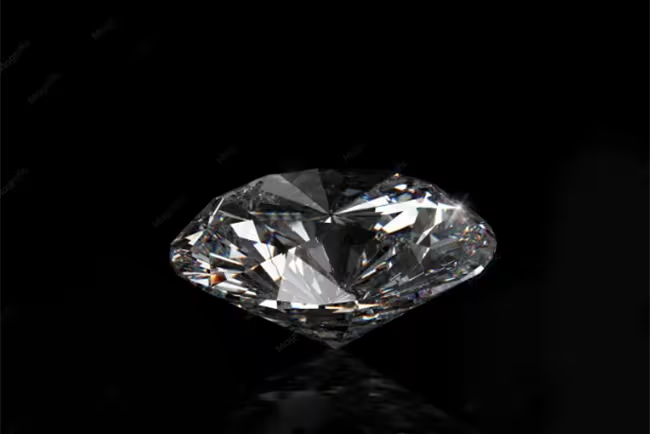
Diamonds and colored gemstones almost never look right straight out of camera. The diffused studio light that makes the metal look clean also kills the contrast inside the stone. A brilliant cut diamond can come out looking like a flat grey disc.
This is one of the most technically tricky parts of jewelry editing because it is easy to overdo it. Too much sharpening creates ugly halos around the prongs. Too much saturation makes a sapphire look like blue plastic. The fix has to be subtle.
The Fix: Mask, Sharpen, and Add Contrast
The workflow most pros use:
- Mask the stone so the edits only affect the gem, not the surrounding metal
- Use High Pass or Smart Sharpen on the masked area to bring out the facet edges
- Add contrast and clarity inside the mask to deepen the micro-contrast between facets
- For colored stones, tweak hue and saturation with a real reference in mind, not just what looks nice on screen
Get this right and the stone comes back to life. Get it wrong and the prongs glow with halos or the color shifts away from the real piece, which causes returns and angry customers.
Challenge 4: Why Hand-Drawn Clipping Paths Beat AI
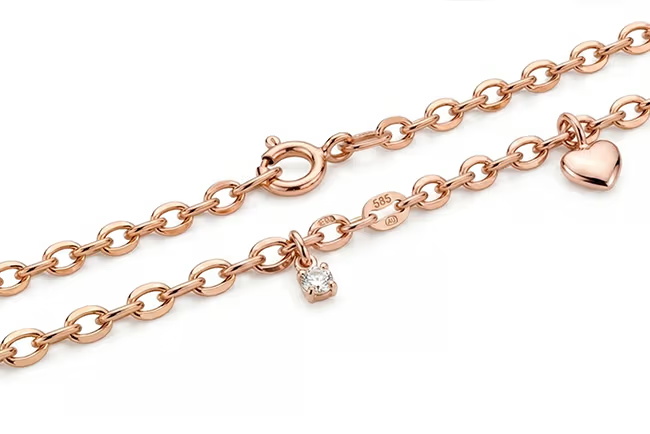
This is where AI background removal really falls apart. Tools that handle a sneaker or a handbag fine will completely fail on a chain necklace or a ring with intricate prongs.
The issues we see most often:
- AI fills in the gaps between chain links instead of cutting them out cleanly
- Semi-transparent gemstones get misread and partially erased
- Fine prongs get sliced or smoothed away
- Pixel residue stays around the edges, especially on curved or polished surfaces
For ecommerce, where every pixel is visible on zoom, these mistakes are obvious. And they are usually harder to fix after the fact than to redo the cutout properly from scratch.
The Fix: Hand-Drawn Pen Tool Paths
Hand-drawn clipping paths use the Pen Tool in Photoshop to trace every contour of the piece at high zoom. The retoucher manually clicks through each curve, link, and prong so the cutout is pixel-perfect.
This matters even more if you are planning color variant images. If you use one base shot for yellow gold, white gold, and rose gold versions, any pixel residue from a sloppy cutout will carry through to every single variant. Clean paths are the foundation everything else sits on.
Challenge 5: Shadows That Make the Piece Feel Real
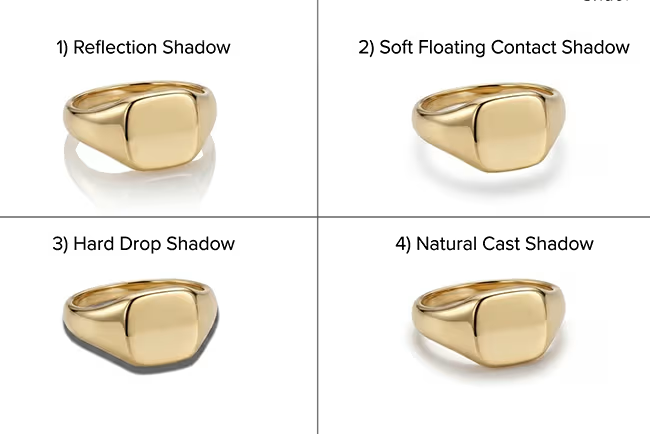
Cut a ring out of its background and place it on pure white with no shadow. It looks like it is floating in space. That is the floating product problem, and it makes any image feel unfinished, even if everything else is perfect.
Adding the right shadow grounds the piece and gives it weight. The wrong shadow can make an expensive ring look like a stock photo. Here is how to think about it:
- Reflection shadow: a mirror-like sheen under the piece, great for rings and pendants shown head-on. Adds a premium feel.
- Floating shadow: a soft, subtle shadow directly below the piece. Works well for earrings and lightweight pieces.
- Drop shadow: a more dimensional shadow set behind or to the side. Good for rings and bracelets lying flat.
- Natural shadow: a rebuilt or preserved shadow that the piece would naturally cast. Best for editorial-style shots.
Pick one style and use it consistently across the catalog. Switching shadow types between SKUs is one of the fastest ways to make a store feel inconsistent.
Challenge 6: Keeping the Whole Catalog Consistent
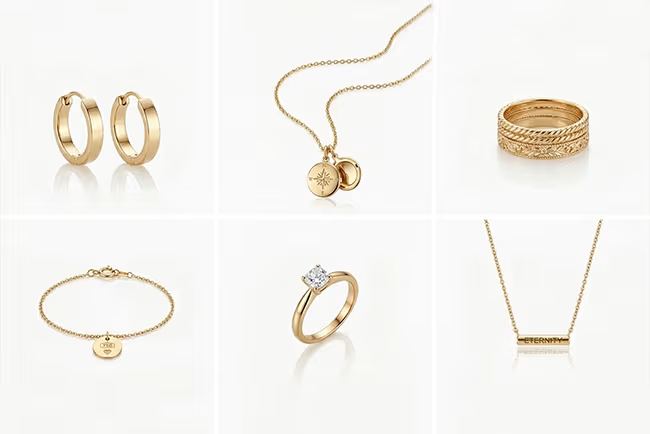
One good photo is easy. Five hundred good photos that all look like they belong together is the actual hard part. This is what separates a small jewelry shop online presence from a luxury brand.
The things that need to stay consistent across a catalog:
- Metal tone. 18K yellow gold should look the same in image 1 and image 500. Silver should hold its cool-white tone across every SKU.
- Shadow style. If half the rings have reflection shadows and half have drop shadows, the grid feels stitched together from different shoots.
- Background. The same exact white (or the same exact off-white, or the same texture). Even a tiny difference is obvious on a product page grid.
- Lighting direction. Highlights and reflections should fall in roughly the same place across similar pieces.
This is where outsourced retouching usually pays off. A team that sets a tone and shadow style at the start of the project, then applies it across the full batch, will deliver more consistent results than someone editing pieces one at a time over a few weeks.
Common Jewelry Retouching Mistakes
Some of the patterns we see most often when cleaning up other people’s edits:
- Over-smoothing the metal. The piece ends up looking like plastic instead of polished gold or silver.
- Wrong shadow type. A heavy drop shadow under a delicate pendant kills the premium feel.
- AI-cut chains. Negative space between links gets filled in, so the chain reads as a flat strip instead of individual links.
- Inconsistent gold tones. One ring leans warm yellow, the next leans green-yellow, and the catalog grid looks off.
- Halos around prongs. Too much sharpening on the stone bleeds into the surrounding metal.
- Heavy saturation on colored stones. The sapphire looks more like a candy than a precious gem.
- Skipping dust cleanup. Macro shots always show specks the eye missed. Leaving them in screams amateur.
When to DIY and When to Hire a Pro
Not every jewelry shop needs an outside retoucher. Here is the honest breakdown:
You can probably DIY if:
- You are shooting one or two pieces for personal use or a small Etsy listing
- The piece is simple (a plain band, a basic chain with no fine settings)
- You have time to learn Photoshop and you enjoy the editing process
- The pieces do not involve heavy gemstone work or focus stacking
You probably want to outsource if:
- You are running an online store with more than 20 to 30 SKUs
- The pieces include diamonds, colored stones, or detailed engravings
- You need color variants (same ring in yellow gold, white gold, rose gold)
- Catalog consistency matters to your brand
- Your time is better spent on photography, sales, or design than on the cleanup
Frequently Asked Questions
What is jewelry photo retouching?
Jewelry photo retouching is the post-production work that makes a raw jewelry shot ready for ecommerce. It usually includes focus stacking, reflection cleanup, gemstone enhancement, clipping paths, color correction, and dust removal.
Why is jewelry so hard to retouch?
Jewelry combines reflective metals, refractive gemstones, intricate details, and macro depth of field issues in one tiny object. Each one needs a different technique, and AI tools usually fail at the precision required.
What is focus stacking in jewelry photography?
Focus stacking is when you shoot the same piece multiple times at different focus points, then blend them into one fully sharp image. Macro shots have shallow depth of field, so stacking is often the only way to get sharpness.
Can AI tools handle jewelry background removal?
Not well. AI tools fill in the gaps between chain links, misread transparent gemstones, and slice through prong details. For ecommerce zoom views, hand-drawn clipping paths in Photoshop are still the most reliable method.
How much does professional jewelry retouching cost?
Pricing depends on the piece and the work needed. At GraphicXer, basic jewelry retouching starts at $0.59 per image. Complex work with focus stacking, gemstone enhancement, or color variants costs more.
How do I keep my jewelry catalog consistent?
Set your metal tone targets and shadow style at the start of the project, then apply them across every image. Outsourced teams handle this well because one editor or team works through the full batch in a unified style.
What shadow style works best for jewelry?
Reflection shadows work best for rings and pendants shown head-on. Floating shadows suit earrings and lightweight pieces. Drop and natural shadows suit editorial or flat-lay shots. The key is staying consistent across the whole catalog.
Do new jewelry pieces still need dust and scratch cleanup?
Yes. Even brand new pieces show dust specks and micro-scratches under a macro lens. The photo lighting picks up things the human eye misses, so dust cleanup is standard in every professional retouch.
Final Words
That wraps up our look at jewelry photo retouching. Jewelry is one of the few product categories where you cannot fake the editing. Cheap shortcuts show up immediately. Customers can tell when the metal looks plastic, when the stones look dull, or when the catalog feels stitched together from different shoots.
The fix is not magic. It is just a stack of careful techniques (focus stacking, reflection cleanup, gemstone work, hand-drawn paths, consistent shadows) applied with patience and attention to detail.
GraphicXer handles jewelry retouching for online stores, photographers, and brands of every size. Our retouchers work in current Adobe tools, deliver in 24 hours, and stay consistent across full catalogs of 50 pieces or 5,000.